Find Mobile Phone Towers Near Your Location
Click through the steps one by one
Click through the steps one by one
If not installed, download and install Google Earth from the Google Earth Download page.
Hint: To speed up the download, uncheck the checkboxes to exclude Google Chrome.
Google Earth will be used to view satellite and land contour images of your location.
You’ll be able to view the hills and mountains and plot a line of site path between a marker at your location to a marker at the cell tower location.
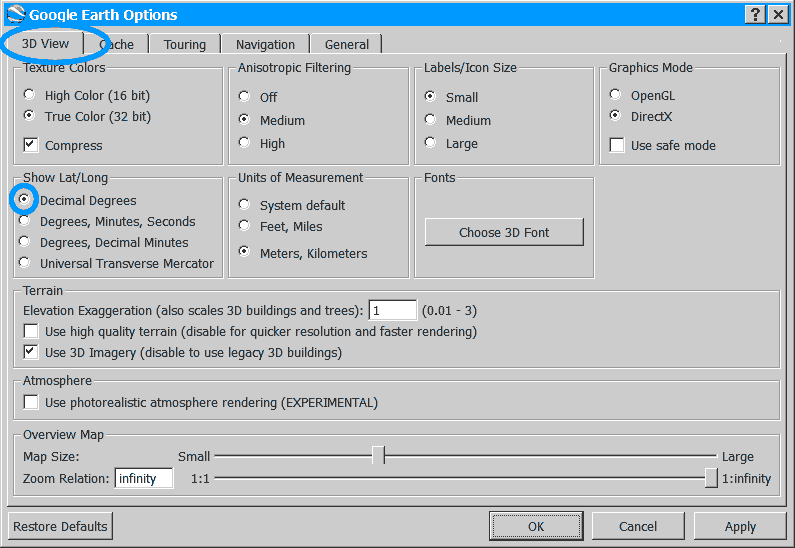
Configure to display Latitude and Longitude in Decimal Degrees.
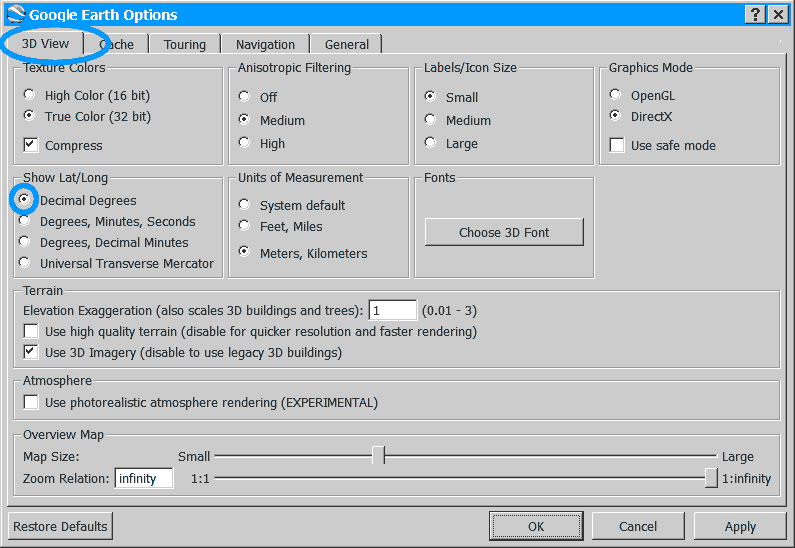
Stop GE from automatically tilting the view as it zooms.
Drop a marker at your location.
1. Paste the Lat/Long coordinates. Press [Search]
2. Drop a marker near your location and drag it to the exact position where your antenna will be mounted.
3. Press [Add], [Placemark].
4. Name your place marker for future reference.
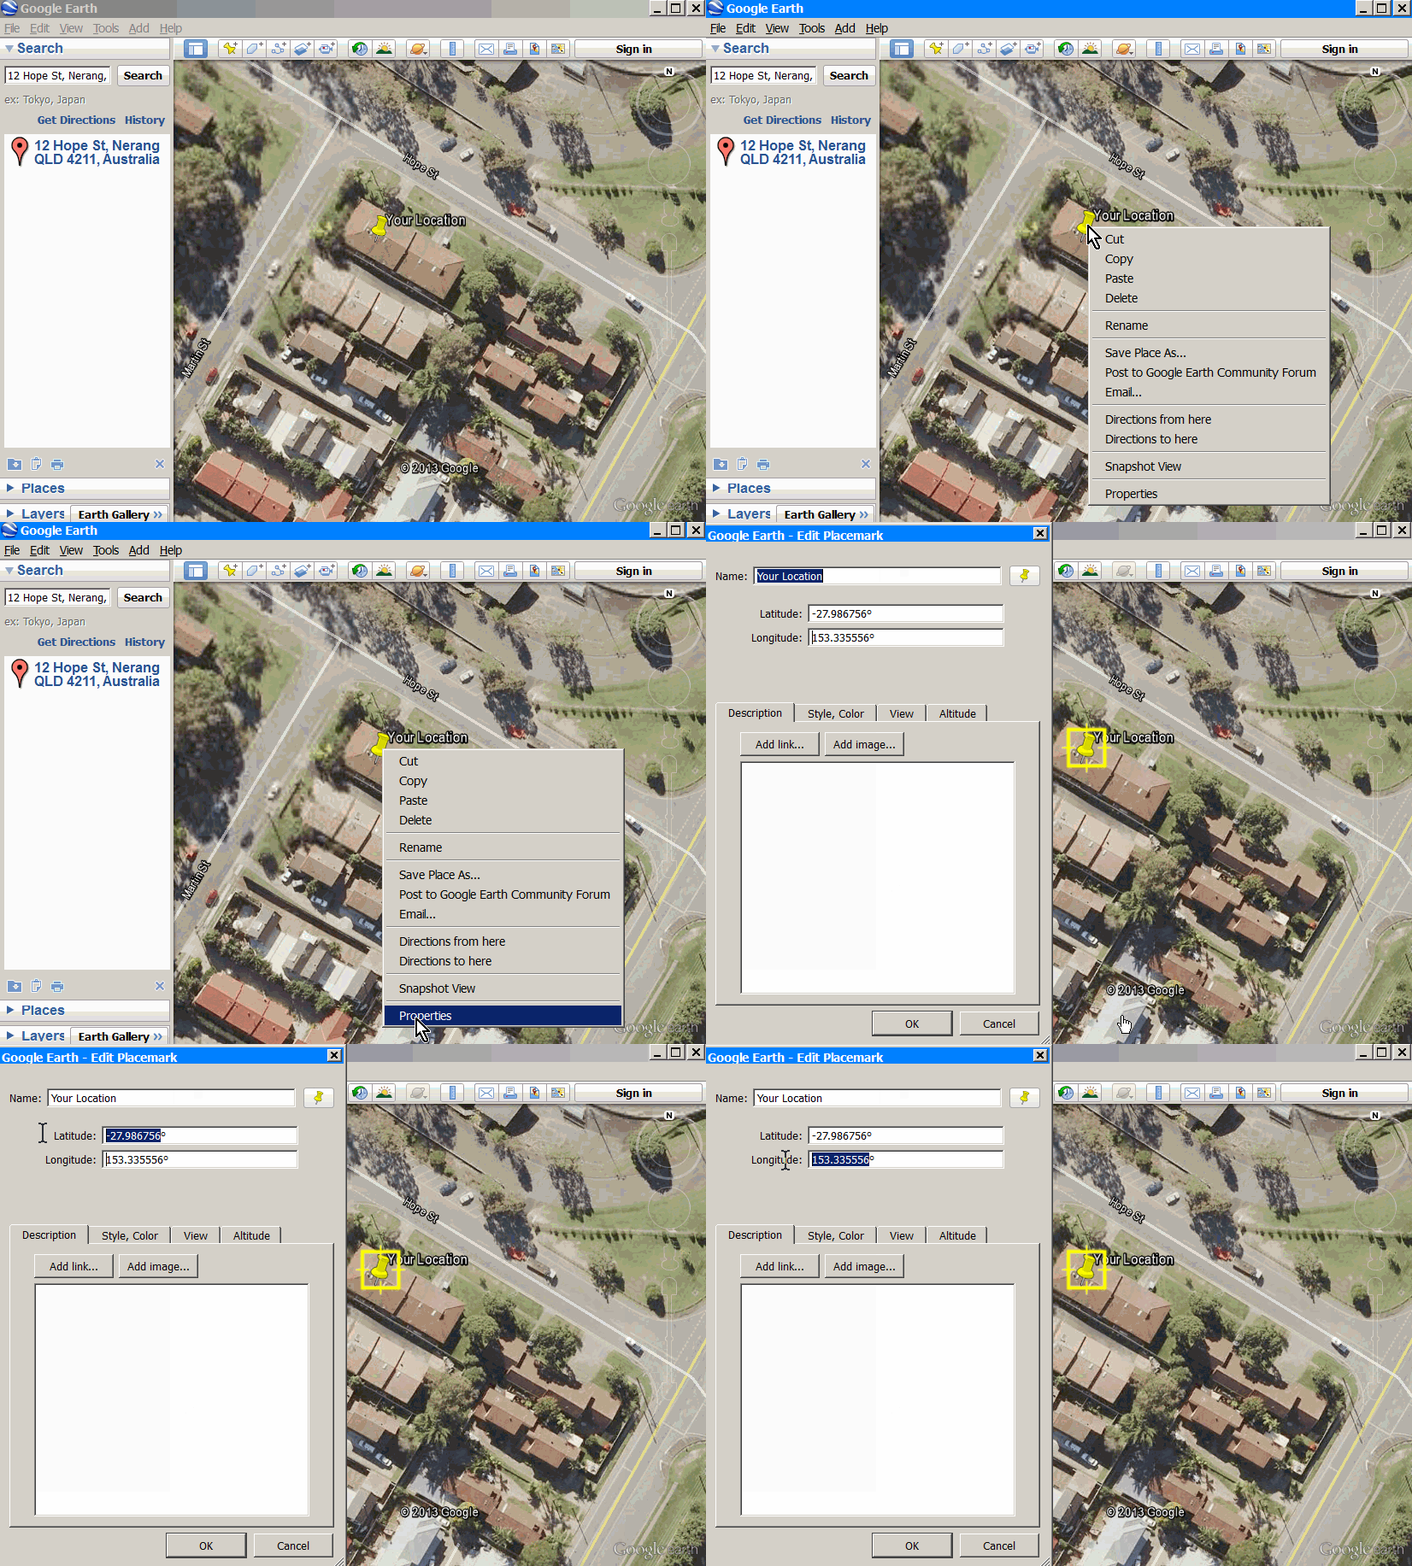
5. Highlight the Coordinates without the “°” and copy them to the notes box, as shown above.
This can make it easy to copy/paste at a later step.
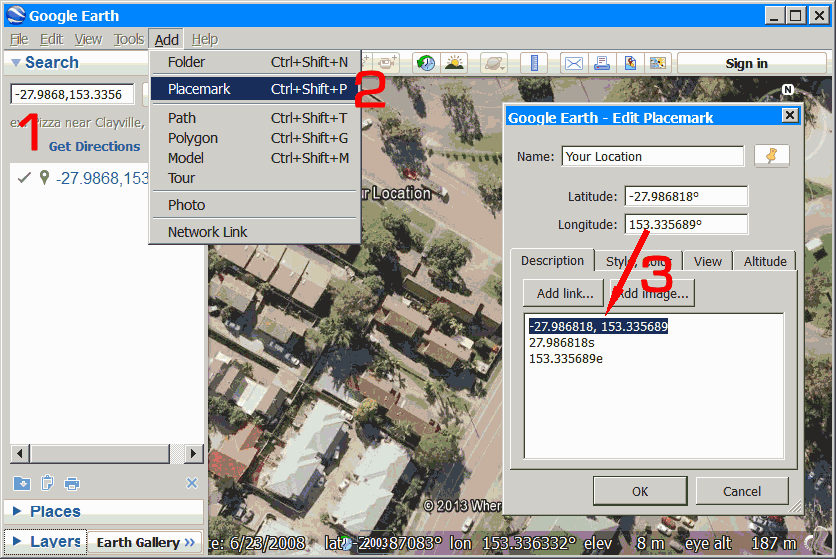
6. Highlight the [Lat, Long] Coordinates and to copy. See 3 in the above image.
7. Leave Google Earth open.
You’ll be using this later, so minimize or re-size without closing it.
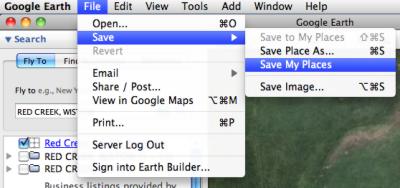
8. Save your work. It’s a good idea to save your placemark by clicking “Save my Places” on the “File, Save” menu of Google Earth.
This saves all your work in Google Earth, so if your PC or Google Earth crashes while doing this research, you won’t need to start over again.
Notes:
The Site Coordinates shown in the bubble are in AGD66 datum format, whereas the coordinates accepted by Google Earth use GDA94/WGS84. The difference between these datum types places ADG66 about 200m southeast of WGS84. Luckily the KML link of the Site Bubble converts the coordinates and opens the location in Google Earth using the correct datum type.
It is very important to locate the exact position of both the tower and your location because a difference of 10m in position might produce a significant difference in signal strength result, depending on the terrain.
Please remember to Save your places at this point.
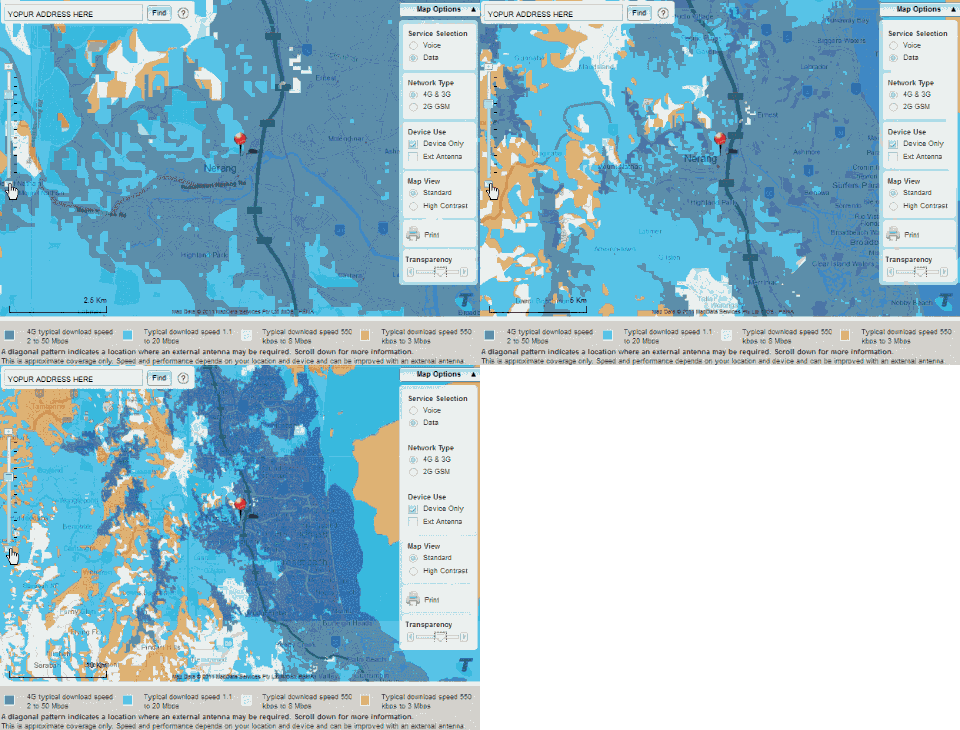
Telstra Example
Vodafone Example
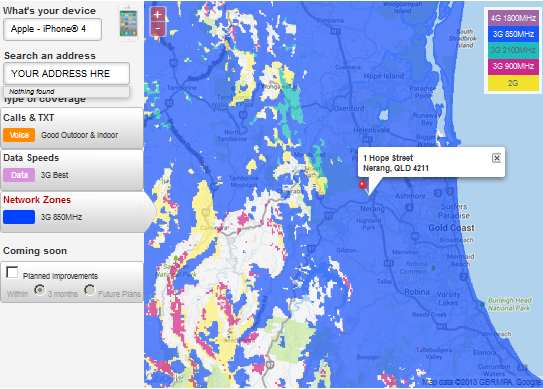
Click Here to check Telstra, Optus and Vodafone coverage maps.
Telstra Coverage Maps accept Lat/Long or street addresses and thus can be pasted into the search box.
Vodafone and Optus Maps allow only valid street addresses.
Zoom in/out to get an idea of where the Cell Towers are located.
The ACMA / RADCOM website has been updated with improved search functions. You can now search for Mobile phone towers near your location by Address, Latitude, Longitude or Postcode. The Results can be filtered by Emissions Designator, Client Name (e.g., Telstra), Frequency, and more.
Search Examples
For other bands, see the list below.
1. Open the ACMA / RADCOM search page.
2. Select “Site or Address or Lat, Long” search box
3. Start typing your street address and select the correct suggestion. Alternatively, paste in the Lat/Long coordinates from Google Earth.
4. Press Enter, or click Go!
1. Click the Filter Sites (Filter in Use) drop-down menu.
2. Select the By Assignments tab.
3. Press Update Map!
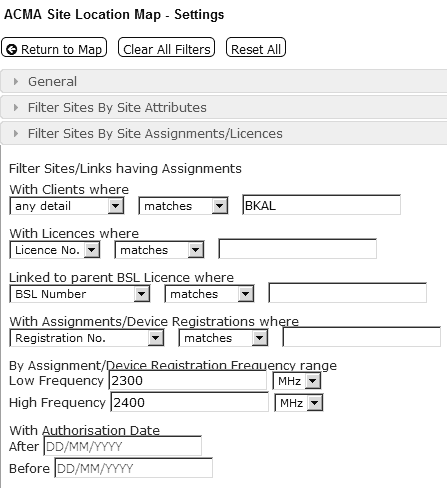
1. Press the filtersFilter Sites By Site Assignments/Licences button.
2. Enter “With Clients where” and “By Assignment/Device Registration Frequency range” values as per below.
3. Press Return to map and allow a few seconds while it is loading sites found
| ||||||||||||||||||||||||||||||||||||||||||||||||||||||||||||||||||||||||||||||||||||||||||||||||||||||||||||||||||||
— To be determined, current at the time of publication. | ||||||||||||||||||||||||||||||||||||||||||||||||||||||||||||||||||||||||||||||||||||||||||||||||||||||||||||||||||||
| % The first 4 characters indicate bandwidth. Eg: 5M00=5MHz, 40M0=40MHz. Higher bandwidth allows for faster data speed. | ||||||||||||||||||||||||||||||||||||||||||||||||||||||||||||||||||||||||||||||||||||||||||||||||||||||||||||||||||||
1. Zoom and drag the map to find cell tower locations.
2. Click on the site marker to show the Site Summary bubble.
3. Right-click on [Site Details] to open the link in a new tab.
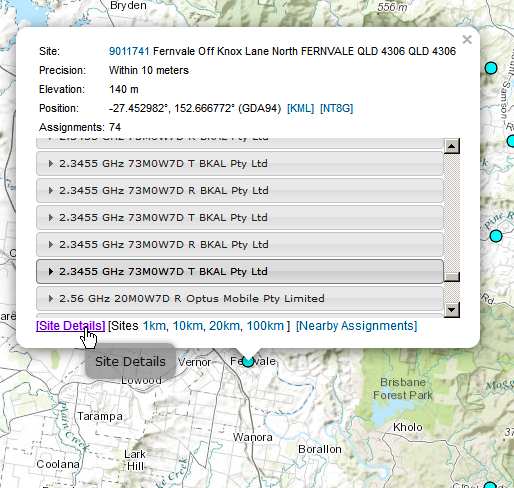
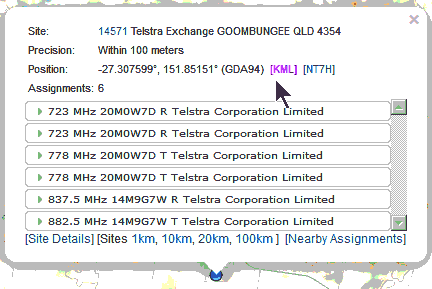
1. Click on the blue site marker
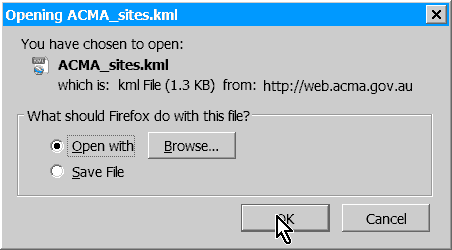
2. Select [Open with] to automatically open the site location in Google Earth
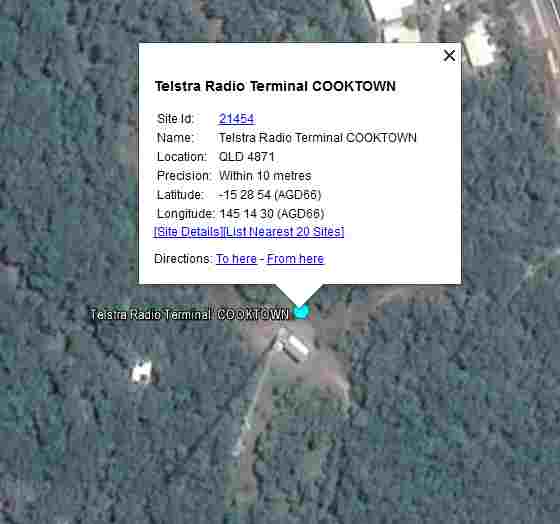
3. View the site on Google Earth
Best viewed in Firefox, SeaMonkey, Opera or Chrome
(basically any browser apart from Internet Explorer)
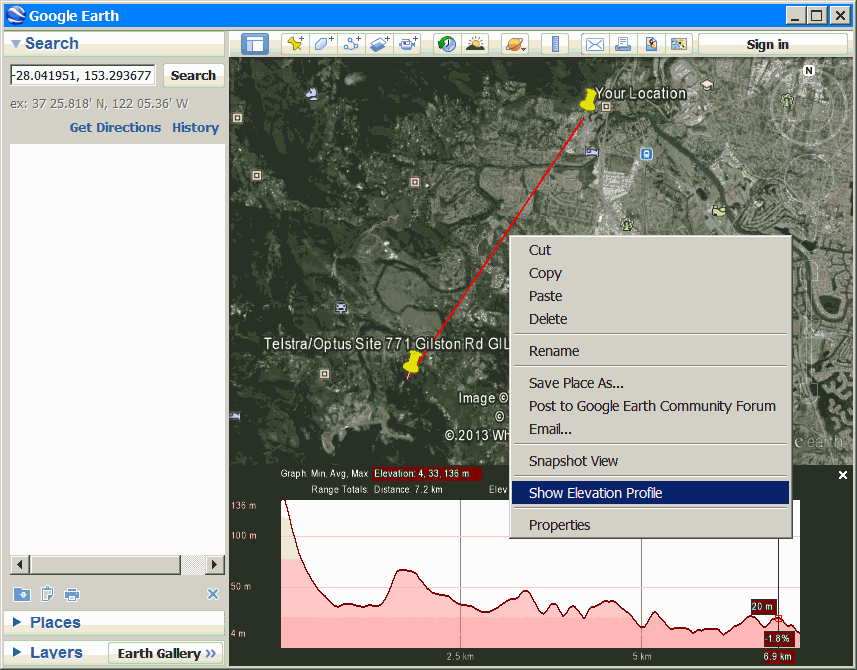
Locate the EXACT position of the cell tower you found using the ACMA/RADCOM site. Draw a path from your location to the cell tower of interest. Do a rough check of the terrain and any obstacles in the path. Assess the terrain between your location and the cell tower.
1. Click on the little blue dot
2. Click the [KLM] link.

3. Select “Open with” and press OK.

4. A new Google Earth Placemarker is dropped at the tower’s location.
5. Click the blue dot to view the site summary & links to site details.
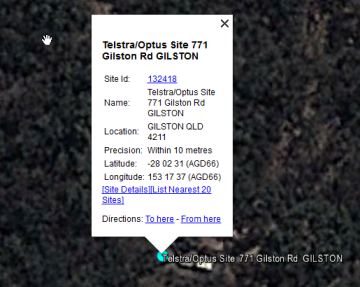
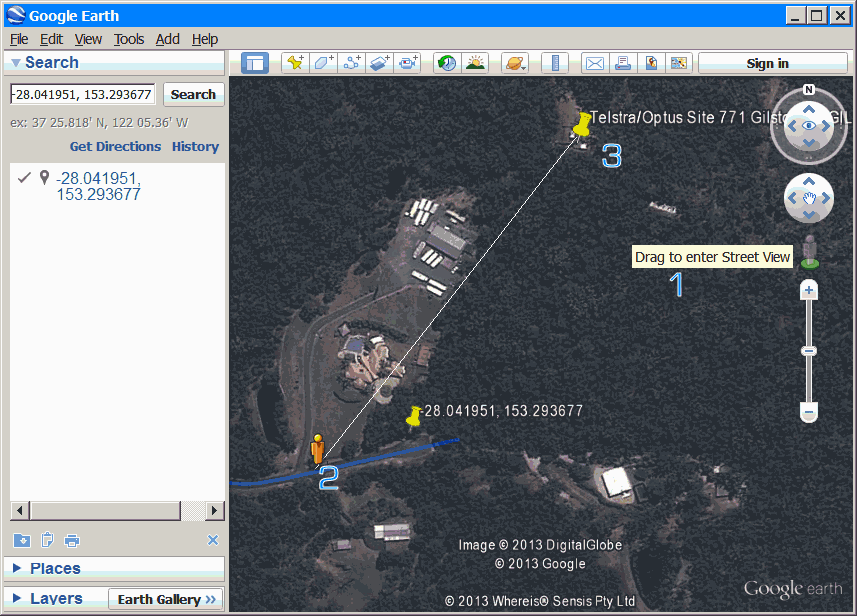
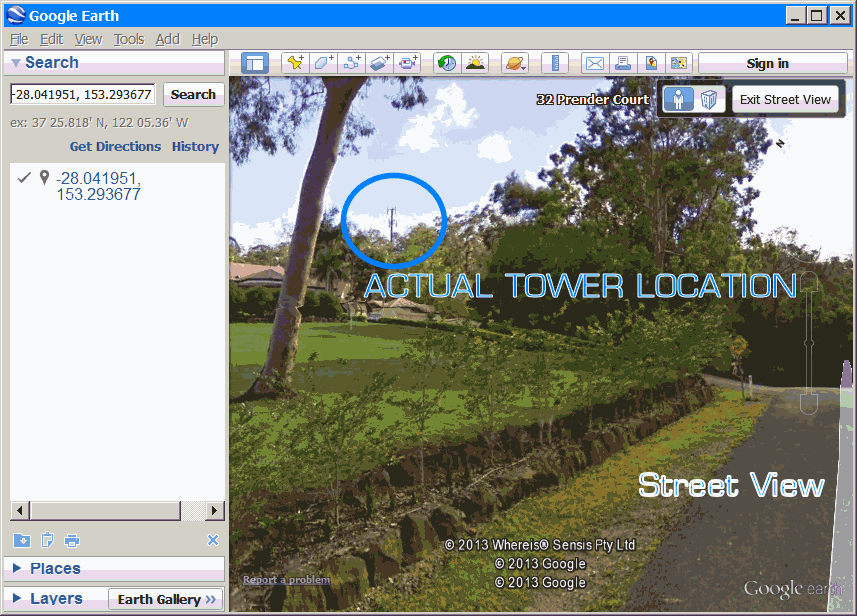
If the tower’s location is not obvious from the first Sky View, you may need to use Street View to locate it visually.
1. With the mouse, click-n-drag the Street View icon to a position where it looks like you’ll get a good view of the tower.
2. Scanning around, look for the tower. It may help to draw a line to where you expect the tower to be.
3. Drop a Placemarker Pin at the exact Tower location and name it.
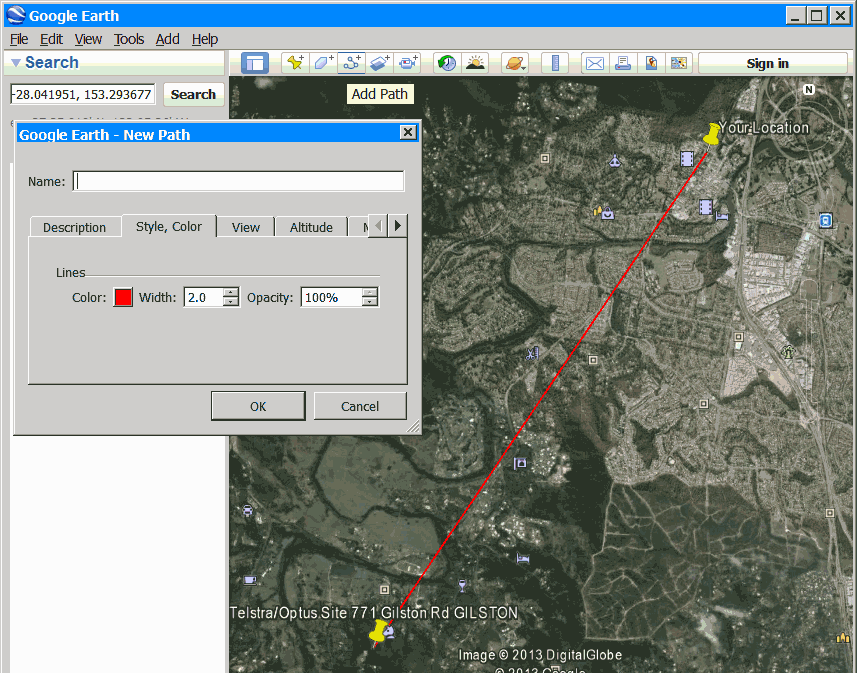
Right-mouse-click on the Line you’ve just drawn and select “Show Elevation Path”.
TIP. The profile becomes more accurate as you zoom in on parts of the path line. Double-click on sections of the elevation profile to zoom in and load that section of the contour.
| RSSI or Signal (dBm) | Rating | Expected Connectivity | |||||
| ↑ -51 to -73 | Excellent | Not affected by cell breathing/loading | |||||
| -75 to -83 | Good | Normally, no problem. Should hold a connection, even with heavy cell loading | |||||
| -85 to- 95 | Fair | Workable under good conditions where interference from neighbouring towers is not present. Could suffer poor data speeds and occasional dropped connection. | |||||
| -97 to -113↓ | Poor | Dramatically lower data speeds and regular disconnects. May not connect. | |||||
RSRP is a more accurate measure of signal strength than RSSI, as it excludes noise and interference on the network. It measures just the usable portion of the signal. Although the 4G RSRP signals appear lower, it does not mean your signal level is worse.
The LigoWave Link Calculator is a powerful tool for determining the signal strength you should expect to achieve from the Mobile Phone Tower. To improve accuracy, enter the information as accurately as possible. Scroll down the page to see the Hints and Tips for default settings.
Note that you’ll need to register with the LigoWave website to use the calculator. A valid email address is required to verify your account. Once registered, set the login page to sign you in automatically on the next visit. If you have any issues viewing this page, please select the link for full-screen mode.

